Preventive Maintenance for Buchi Rotary Evaporators: Complete Guide
Safety Notice
Always follow proper safety procedures when performing maintenance or repairs on laboratory equipment. Ensure equipment is powered off and disconnected before beginning any work. If you're unsure about any procedure, consult with a qualified technician.
Preventive Maintenance for Buchi Rotary Evaporators: Complete Guide
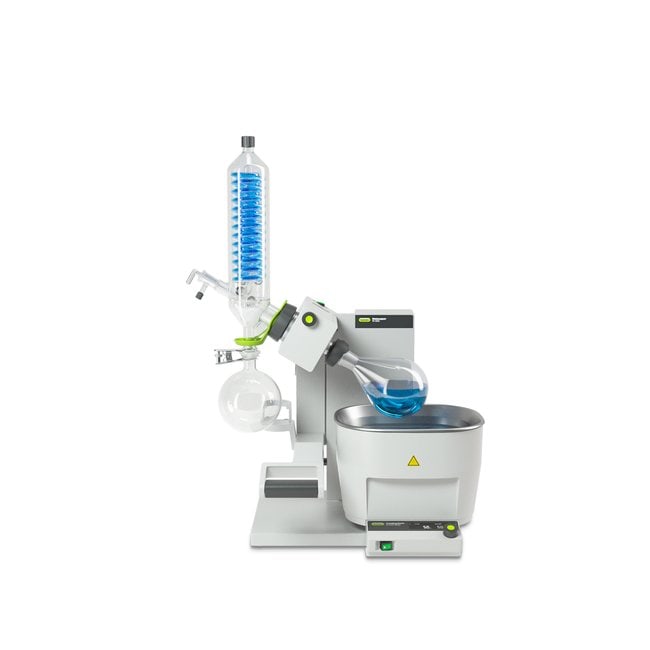
Preventive maintenance is the cornerstone of reliable laboratory equipment operation. A well-maintained Buchi Rotavapor system delivers consistent performance, minimizes downtime, extends equipment lifespan, and ensures operator safety. This comprehensive guide provides detailed maintenance schedules, step-by-step procedures, and parts replacement guidelines for all Buchi Rotavapor models including the R-100, R-220 Pro, R-300, and related systems.
The Importance of Preventive Maintenance
Rotary evaporators are precision instruments subjected to continuous thermal cycling, vacuum stress, chemical exposure, and mechanical wear. Without proper maintenance, performance degrades gradually—often imperceptibly—until critical failures occur. Studies show that preventive maintenance programs reduce unplanned downtime by up to 75% and extend equipment life by 30-50%.
For Buchi Rotavapor systems, preventive maintenance offers specific benefits:
- Maintains vacuum integrity through regular seal inspection and replacement
- Ensures temperature accuracy via calibration and sensor maintenance
- Prevents contamination through systematic cleaning protocols
- Reduces energy consumption by maintaining optimal system efficiency
- Protects your investment by preserving equipment value
- Ensures regulatory compliance for GLP, GMP, and ISO-certified laboratories
Comprehensive Maintenance Calendar
The following calendar provides a structured approach to Rotavapor maintenance. Adjust frequencies based on usage intensity—high-throughput laboratories should increase inspection frequency.
Daily Maintenance Tasks (5-10 minutes)
Pre-Operation Inspection:
| Task | Checkpoint | Action Required | |------|------------|------------------| | Visual glassware inspection | Check for cracks, chips, or stress marks | Replace damaged components immediately | | Seal condition check | Examine rotary seal for wear or deformation | Note any degradation for monitoring | | Connection security | Verify all clamps and connections | Tighten loose connections | | Vacuum tubing | Check for cracks or brittleness | Replace if compromised | | Heating bath fluid level | Ensure adequate level (within marked range) | Top up as needed | | Power cord and plug | Inspect for damage | Replace if frayed or damaged | | Display functionality | Verify all indicators working | Document any errors |
Post-Operation Procedures:
- Empty and rinse collection flask while still warm
- Wipe down external surfaces with appropriate cleaner
- Document any unusual observations in maintenance log
- Ensure proper shutdown sequence followed
- Store glassware in protective racks
Weekly Maintenance (30-45 minutes)
Cleaning and Inspection Protocol:
-
Glassware Deep Cleaning:
- Disassemble all glassware components
- Wash with appropriate detergent (Buchi recommends Deconex® 20 NS-x)
- Rinse thoroughly with deionized water
- Inspect ground glass joints under good lighting
- Dry in drying oven at 60-80°C or air dry on rack
- Apply thin film of high-vacuum grease to joints
-
Heating Bath Maintenance:
- Check fluid clarity (water or oil depending on model)
- Clean any residue from bath walls
- Verify temperature accuracy with calibrated thermometer
- Check for leaks around seals
-
Condenser Inspection:
- Examine coolant flow rate and temperature
- Check for visible deposits or scaling
- Inspect coolant connections for leaks
- Verify proper drainage
-
Vacuum System Check:
- Run vacuum pump and verify ultimate vacuum achieved
- Listen for unusual noises indicating wear
- Check vacuum controller calibration
- Inspect condensate trap if equipped
-
Electrical and Control Systems:
- Test all control functions (temperature, rotation, lift)
- Verify display accuracy
- Check emergency stop function
- Test all safety interlocks
Monthly Maintenance (1-2 hours)
Comprehensive System Inspection:
1. Seal Examination and Lubrication:
The rotary seal is the most critical maintenance item on any Rotavapor. Monthly inspection prevents vacuum leaks and contamination.
Procedure:
- Power down and disconnect the unit
- Remove evaporating flask assembly
- Carefully inspect seal surface for:
- Wear patterns or grooves
- Discoloration indicating chemical attack
- Loss of elasticity (hardening)
- Deformation or permanent compression
- Clean seal surface with lint-free cloth and isopropanol
- Apply appropriate lubricant (Buchi specifies VS-22 or VS-26 seals with compatible lubricant)
- Reassemble and perform leak test
2. Vacuum Leak Testing:
Systematic leak testing identifies problems before they impact performance.
Standard Leak Test Procedure:
- Close all system valves
- Evacuate system to ultimate vacuum
- Isolate from vacuum pump
- Monitor vacuum gauge for 15 minutes
- Acceptable leak rate: <5 mbar increase over 15 minutes
- If leak rate exceeds specification, systematically test each component
3. Mechanical Component Inspection:
| Component | Inspection Points | Maintenance Action | |-----------|-------------------|--------------------| | Rotation motor | Bearing noise, vibration, temperature | Lubricate bearings per spec | | Drive mechanism | Belt tension, gear wear | Adjust tension, replace worn parts | | Lift system | Smooth operation, unusual sounds | Clean rails, lubricate slides | | Safety guards | Secure mounting, no cracks | Tighten, replace if damaged | | Clamps and holders | Spring tension, corrosion | Replace weak springs, clean threads |
4. Calibration Verification:
Verify key parameters against known standards:
- Temperature: Compare bath temperature with certified thermometer (±2°C tolerance)
- Rotation speed: Use tachometer to verify display accuracy (±5 rpm tolerance)
- Vacuum pressure: Compare gauge reading with calibrated standard (±2 mbar tolerance)
Document all readings in maintenance log.
Quarterly Maintenance (2-3 hours)
Deep Maintenance Session:
1. Complete Disassembly Cleaning:
- Remove all glassware components
- Disassemble vapor duct assembly (if applicable)
- Clean all internal surfaces accessible without voiding warranty
- Remove any accumulated residue or deposits
- Inspect o-rings and gaskets throughout system
- Replace any questionable sealing components
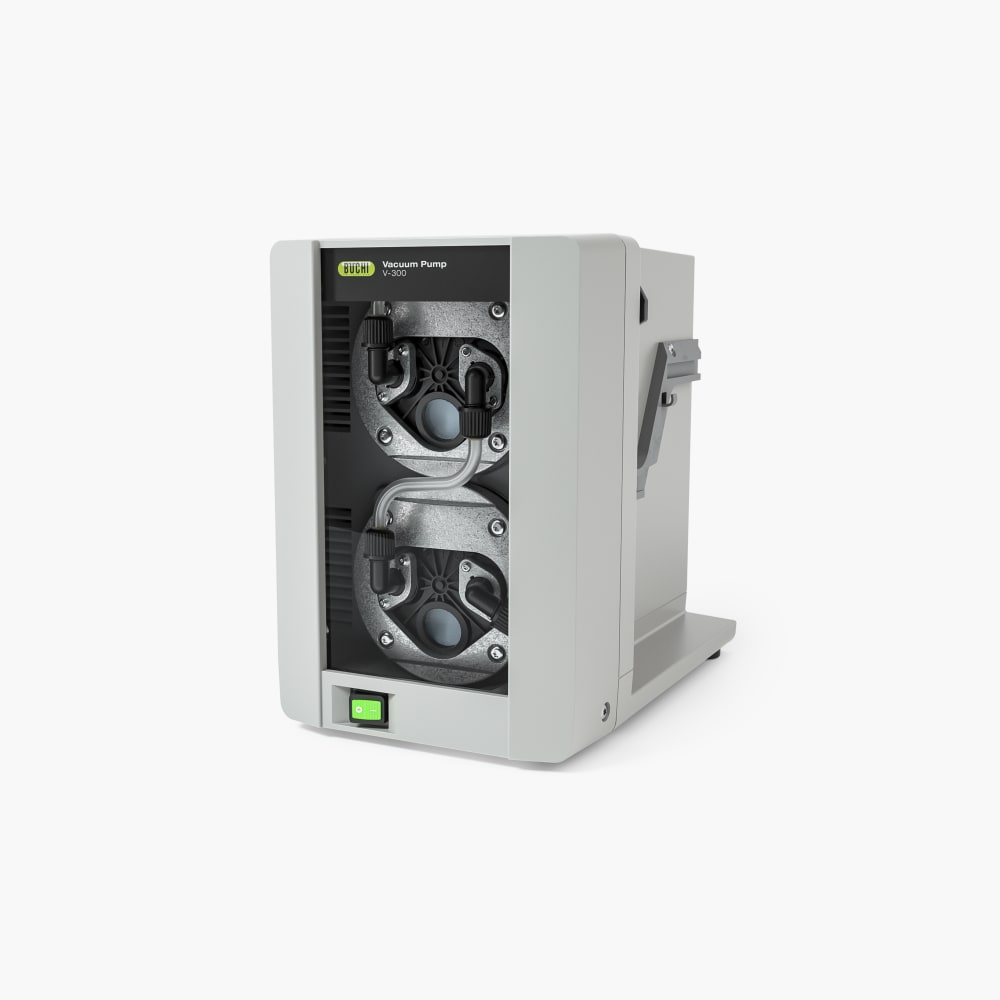
2. Vacuum Pump Service:
For oil-free diaphragm pumps (V-300, V-700):
- Check diaphragm integrity (listen for air leaks)
- Inspect inlet filters and clean/replace
- Verify ultimate vacuum specification met
- Check exhaust filter condition
- Test automatic gas ballast operation (if equipped)
For oil-sealed rotary vane pumps (if used):
- Change pump oil (use manufacturer-specified grade)
- Clean oil mist filter
- Inspect vanes for wear
- Check shaft seal for leaks
3. Heating Bath Deep Service:
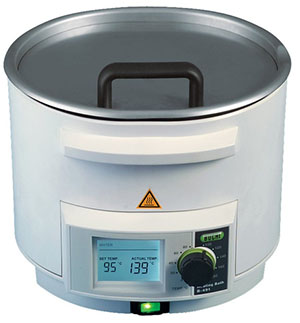
- Drain and replace bath fluid
- Descale heating elements (use appropriate descaling solution for your water hardness)
- Inspect heating element integrity (resistance test)
- Check temperature sensor response time
- Clean temperature sensor probe
- Test overheat cutout function
- Inspect bath housing for corrosion
4. Electrical System Inspection:
⚠️ Only qualified personnel should perform electrical inspections
- Visual inspection of wiring and connections
- Check ground continuity
- Inspect power cord for damage
- Test GFCI/RCD function (if equipped)
- Verify all safety interlocks operate correctly
- Check motor brushes (if accessible)
Annual Maintenance (4-6 hours or Professional Service)
Comprehensive Service and Calibration:
Many laboratories schedule annual professional service to ensure comprehensive maintenance and documentation. Annual service typically includes:
1. Complete System Calibration:
- Multi-point temperature calibration with certified standards
- Vacuum controller calibration across full range
- Rotation speed calibration verification
- Lift mechanism calibration (if electronically controlled)
2. Preventive Parts Replacement:
Certain components have predictable wear patterns and should be replaced annually regardless of apparent condition:
| Component | Typical Lifespan | Part Numbers (Examples) | Replacement Reason | |-----------|------------------|-------------------------|--------------------| | Rotary seal | 1 year or 2000 hours | VS-22, VS-26 | Prevents vacuum leaks | | Vacuum tubing | 1-2 years | Various | Maintains flexibility | | Heating bath fluid | 1 year (oil) | Synthetic heat transfer oil | Maintains thermal properties | | O-rings and gaskets | 1-2 years | Model-specific kits | Prevents leaks | | Drive belts | 2 years or as needed | Model-specific | Prevents belt failure | | Vacuum pump filter | 1 year | Model-specific | Protects pump, maintains flow |
3. Safety System Verification:
- Test all emergency stop functions
- Verify safety interlocks prevent unsafe operation
- Test overheat protection cutout
- Inspect electrical safety ground
- Verify proper ventilation clearances
- Update safety documentation
4. Performance Testing:
Standardized performance test using reference solvent (typically ethanol):
- Measure time to evaporate 500mL at standard conditions
- Document vacuum performance curve
- Verify temperature stability over extended run
- Test automatic functions (if equipped)
- Compare results to baseline/manufacturer specifications
Detailed Maintenance Procedures
Seal Replacement Procedure
The rotary seal is the most frequently replaced component. Proper installation is critical for performance.
Tools Required:
- Lint-free cloths
- Isopropanol or ethanol
- High-vacuum grease
- Seal removal tool (if available)
- Replacement seal (VS-22 or VS-26 depending on model)
Step-by-Step Process:
-
Preparation:
- Power off and disconnect unit
- Allow heating bath to cool completely
- Remove evaporating flask
- Photograph assembly for reference
-
Seal Removal:
- Carefully remove retaining clips or adapter
- Note orientation of existing seal
- Use seal removal tool or careful prying (avoid scratching housing)
- Clean seal housing thoroughly with isopropanol
- Inspect housing for wear or damage
-
New Seal Installation:
- Verify correct seal type for your model
- Lightly lubricate seal with compatible grease
- Carefully position seal ensuring proper orientation
- Install retaining adapter or clips
- Verify seal seats properly without gaps
-
Verification:
- Reassemble glass components
- Perform leak test (target <5 mbar increase over 15 minutes)
- Run test evaporation
- Document seal replacement in maintenance log
Condenser Cleaning Procedure
Scale buildup in condenser coils significantly reduces cooling efficiency.
Descaling Process:
- Drain coolant from system
- Prepare descaling solution (citric acid 5-10% or commercial descaler)
- Circulate descaling solution through condenser for 30-60 minutes
- Rinse thoroughly with deionized water (minimum 3 rinses)
- Refill with fresh coolant
- Verify proper cooling performance
Frequency depends on water hardness:
- Soft water (<50 ppm): Annually
- Medium hardness (50-150 ppm): Every 6 months
- Hard water (>150 ppm): Quarterly or use DI water
Parts Inventory and Replacement Planning
Recommended Spare Parts Inventory:
Maintain these critical spares to minimize downtime:
- Rotary seals (2-3 units)
- O-ring assortment kit
- Vacuum tubing (2 meters)
- Glassware adapter set
- Fuses for your model
- Drive belt (if applicable)
- Vacuum pump inlet filter
Safety Precautions for Maintenance
MANDATORY SAFETY REQUIREMENTS:
⚠️ Electrical Safety:
- Always disconnect power before maintenance
- Use lockout/tagout procedures per OSHA 29 CFR 1910.147
- Only qualified electricians should perform electrical work
- Verify zero voltage with meter before touching electrical components
⚠️ Chemical Safety:
- Wear appropriate PPE (safety glasses, chemical-resistant gloves, lab coat)
- Work in well-ventilated area or fume hood
- Follow facility Chemical Hygiene Plan
- Properly dispose of used solvents and cleaning solutions
- Consult SDS for all chemicals handled
⚠️ Thermal Hazards:
- Allow adequate cooling time (minimum 30 minutes after shutdown)
- Use heat-resistant gloves when handling warm components
- Post warning signs during cooling period
⚠️ Mechanical Hazards:
- Support glassware properly during handling
- Use both hands when moving large flask assemblies
- Wear cut-resistant gloves when handling broken glassware
- Properly dispose of broken glass in designated sharps container
Maintenance Documentation
Proper documentation is essential for:
- Regulatory compliance (GLP, GMP, ISO 9001)
- Warranty claims
- Performance trending
- Service planning
- Training records
Required Documentation:
-
Maintenance Log Book:
- Date and time of maintenance
- Tasks performed
- Parts replaced with part numbers
- Test results and measurements
- Technician signature
- Next maintenance due date
-
Calibration Records:
- Calibration date
- Standards used
- As-found and as-left values
- Adjustments made
- Next calibration due date
-
Parts Replacement Records:
- Component replaced
- Part number
- Serial number (if applicable)
- Reason for replacement
- Supplier and order information
Troubleshooting Maintenance-Related Issues
Even with proper maintenance, issues can arise:
Premature Seal Failure:
- Check for chemical incompatibility
- Verify proper installation technique
- Assess operating temperature exposure
- Consider upgrading to PTFE-lined seal for aggressive solvents
Persistent Vacuum Leaks:
- Perform systematic component isolation testing
- Consider glassware replacement (ground joints wear over time)
- Check for micro-cracks with dye penetrant
- Verify vacuum pump ultimate pressure capability
Temperature Drift:
- Recalibrate sensor
- Check heating element resistance
- Verify proper bath fluid level and type
- Assess ambient temperature effects
Conclusion
A comprehensive preventive maintenance program is essential for reliable Rotavapor operation. By following these schedules and procedures, you'll maximize equipment performance, minimize unexpected failures, and protect your laboratory's productivity. Remember that maintenance is an investment that pays dividends in reduced downtime, extended equipment life, and consistent results.
References:
- Buchi Labortechnik AG. "Maintenance Guidelines for Rotavapor Systems." Buchi.com Support Documentation, 2024. www.buchi.com/support
- U.S. Department of Labor. "Control of Hazardous Energy (Lockout/Tagout)." OSHA.gov, 29 CFR 1910.147. www.osha.gov/laws-regs/regulations/standardnumber/1910/1910.147
- Buchi Labortechnik AG. "Spare Parts Catalog and Service Intervals." Technical Documentation, 2024.
This guide is intended for trained laboratory personnel. Always consult your specific model's operating manual and follow your institution's safety procedures. For complex maintenance or calibration, contact Buchi-certified service technicians.
Disclaimer
This technical guide is provided for informational purposes only. While we strive for accuracy, equipment specifications and procedures may vary. Always consult official manufacturer documentation and qualified technicians for specific repair procedures. The author and Buchi Equipment Authority assume no liability for any damages or injuries resulting from the use of this information.